React Nativeの開発環境をMacに構築するには、以下の手順に従ってください。
Node.jsのインストール
まず、Node.jsをインストールする必要があります。Node.jsは、React Nativeアプリケーションの開発に必要なJavaScriptランタイムです。今回はDocker環境を使用します。
docker run -it --name react-native-dev --entrypoint "/bin/sh" node:18.16.0
Watchmanのインストール
Watchmanは、React Nativeのファイルシステムを監視して、ファイルの変更を検出するために使用されます。コンテナにログイン後に以下のコマンドをターミナルに入力して、Watchmanをインストールしてください。
sudo apt-get update
sudo apt-get install -y autoconf automake build-essential python-dev libssl-dev libtool

git clone https://github.com/facebook/watchman.git -b v4.9.0 --depth 1
cd watchman
sudo ./autogen.sh
sudo ./configure --disable-dependency-tracking --enable-lenient
sudo make
sudo make install
Xcodeのインストール
React NativeアプリケーションをiOSデバイスでテストする場合は、Xcodeをインストールする必要があります。Xcodeは、iOSアプリケーションの開発に必要な統合開発環境(IDE)です。App StoreからXcodeをダウンロードしてインストールしてください。

React Nativeプロジェクトの作成
こちらのサイトを参考にさせていただきました。 mo-gu-mo-gu.com
プロジェクトの初期化と必要ライブラリのインストール
現在のReact NativeではデフォルトでTypeScriptテンプレート(.tsx)を使用します。 今回はパッケージ関連の操作はyarnで行います。
また、今回はiOSだけではなくWebアプリとしてもビルド・動作確認したいのでreact-native-web用の環境も合わせて整備していきます。
curl -sS https://dl.yarnpkg.com/debian/pubkey.gpg | sudo apt-key add -
echo "deb https://dl.yarnpkg.com/debian/ stable main" | sudo tee /etc/apt/sources.list.d/yarn.list
apt-get update && apt-get install yarn

npx react-native init test && cd $_
yarn add react-native-web
yarn add -D babel-plugin-react-native-web webpack webpack-cli webpack-dev-server html-webpack-plugin react-dom babel-loader url-loader @svgr/webpack
index.htmlの作成
ルートファイルとなるindex.htmlを追加します。 /web/index.htmlとして作成します。
<!DOCTYPE html>
<html>
  <head>
  <meta charset="UTF-8" />
  <meta name="viewport" content="width=device-width, initial-scale=1.0" />
  <meta http-equiv="X-UA-Compatible" content="ie=edge" />
  <title>RN Web example</title>
    <style>
      #app-root {
          display: flex;
          flex: 1 1 100%;
          height: 100vh;
      }
    </style>
  </head>
  <body>
    <div id="app-root"></div>
  </body>
</html>
index.web.jsの作成
Web用にAppをindex.htmlに紐づけます。 プロジェクトルートに配置します。
import React from 'react';
import {AppRegistry} from 'react-native';
import App from './App';

AppRegistry.registerComponent('App', () => App);

AppRegistry.runApplication('App', {
  rootTag: document.getElementById('app-root'),
});
webpack.config.jsの作成
続いてwebpack.config.jsを追加します。 こちらもプロジェクトルートに配置します。
const path = require('path');

const webpack = require('webpack');
const HtmlWebpackPlugin = require('html-webpack-plugin');

const appDirectory = path.resolve(__dirname);
const {presets} = require(`${appDirectory}/babel.config.js`);

const compileNodeModules = [
  // Add every react-native package that needs compiling
  // e.g. 'react-native-gesture-handler',
].map(moduleName => path.resolve(appDirectory, `node_modules/${moduleName}`));

const babelLoaderConfiguration = {
  test: /\.js$|tsx?$/,
  // Add every directory that needs to be compiled by Babel during the build.
  include: [
    path.resolve(appDirectory, 'index.web.js'),
    path.resolve(appDirectory, 'App.tsx'),
    path.resolve(appDirectory, 'src'),
    ...compileNodeModules,
  ],
  use: {
    loader: 'babel-loader',
    options: {
      cacheDirectory: true,
      presets,
      plugins: ['react-native-web'],
    },
  },
};

const svgLoaderConfiguration = {
  test: /\.svg$/,
  use: [
    {
      loader: '@svgr/webpack',
    },
  ],
};

const imageLoaderConfiguration = {
  test: /\.(gif|jpe?g|png)$/,
  use: {
    loader: 'url-loader',
    options: {
      name: '[name].[ext]',
    },
  },
};

module.exports = {
  entry: {
    app: path.join(appDirectory, 'index.web.js'),
  },
  output: {
    path: path.resolve(appDirectory, 'dist'),
    filename: 'bundle.web.js',
  },
  resolve: {
    extensions: ['.web.tsx', '.web.ts', '.tsx', '.ts', '.web.js', '.js'],
    alias: {
      'react-native$': 'react-native-web',
    },
  },
  module: {
    rules: [
      babelLoaderConfiguration,
      imageLoaderConfiguration,
      svgLoaderConfiguration,
    ],
  },
  plugins: [
    new HtmlWebpackPlugin({
      template: path.join(appDirectory, './web/index.html'),
    }),
    new webpack.HotModuleReplacementPlugin(),
    new webpack.DefinePlugin({
      // See: https://github.com/necolas/react-native-web/issues/349
      __DEV__: JSON.stringify(true),
    }),
  ],
};
App.tsxを修正
簡易動作確認用に修正します。
import React from 'react';
import {
  SafeAreaView,
  ScrollView,
  StatusBar,
  Text,
  useColorScheme,
  View,
} from 'react-native';

const App = () => {
  const isDarkMode = useColorScheme() === 'dark';

  return (
    <SafeAreaView>
      <StatusBar barStyle={isDarkMode ? 'light-content' : 'dark-content'} />
      <ScrollView contentInsetAdjustmentBehavior="automatic">
        <View>
          <Text>Hello react native web</Text>
        </View>
      </ScrollView>
    </SafeAreaView>
  );
};

export default App;
package.jsonにScriptを追加
react-native-webをビルドするために、web-buildとwebの2つを追加します。
{
  ...
  "scripts": {
    :
    "web-build": "rm -rf dist/ && webpack --mode=production --config webpack.config.js",
    "web": "webpack serve --mode=development --config webpack.config.js"
  },
  ...
}
Webでのアプリケーション起動
webpackを起動します。
yarn web
ブラウザでhttp://localhost:8080/にアクセスします。
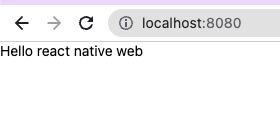
無事にWebでアプリケーションの動作が確認できました。
iPhoneシミュレーターでのアプリケーション起動
いくつか準備が必要になります。
まずはCocoapodsを入れます
sudo gem install cocoapods